It is easier to temper larger amounts of chocolate by hand, at least 1kg. But if this is too much for your requirements give tempering a smaller amount a go. Tempered chocolate is shiny and has a 'snap' when broken, untempered chocolate pieces will go grey and dull or have a grainy appearance and texture (bloom). If you are doing show pieces it really is essential. You can also temper by 'seeding'-adding tempered chocolate to untempered chocolate.
For manual tempering heat the chocolate to 40-45C
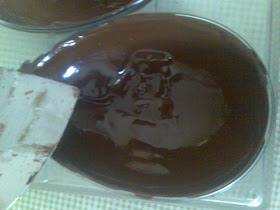
Turn 2/3 of the chocolate out on to work surface (granite is best but you can use any surface-the process usually will just take longer ). It can be hard to gauge 2/3- a good tip is to quickly pour the chocolate from the bowl on to the surface without using a scraper etc. The amount of chocolate left in the bowl will be the right amounts-it is essential you then scrape down the sides of the bowl so the chocolate sits as a central mass in the bowl
 |
| now scrape the sides |
Now bring the chocolate back into the centre with a scraper, wipe excess chocolate off the scraper on to the palette knife as you work. You can check the temperature of the chocolate now if you wish it should be at 28C for dark and 26C for milk and white. If it is too warm repeat the spreading and scraping before taking the temperature again. If the chocolate is too cold (it may start to seize if it is) you'll have to remove the chocolate and add to the chocolate in the bowl and start again-reheating to 40 or 45C. (if you don't have a thermometer and are going to use this chocolate for yourself, you can check the temperature the old fashioned way-touch some chocolate from the scraper to your lip-it should feel neither hot or cold.

 |
| bring the chocolate together on work surface then spread out again |
For these eggs I cut out some letters in fondant icing and placed them inside the egg moulds, then piped around the letters with tempered chocolate so as to keep them in place-the result will be that the letters are flush with chocolate shell.
 |
| make sure your moulds aren't cold when you add the chocolate |
You can spray your moulds with a 50:50 mix of cocoa butter and chocolate for extra shine
 |
| place letters haphazardly or straight and pipe around-the letters will be flush with the chocolate |
Fill the eggs to top with chocolate then give a tap on the side with the scraper to remove any air bubbles, then turn the moulds upside down over the bowl of chocolate. Then turn the mould back over and scrape away any excess chocolate from the side of the mould.
 |
| the letters are flush with the chocolate |
 |
| you can see here the chocolate has begun to contract |
 |
| the contraction is increasing |
Once the chocolate has clearly contracted you can remove the egg form the mould by gently sliding it out of the mould. Wear cotton gloves for this (most plastic gloves will still allow finger prints to come through) You don't have to buy expensive chocolate gloves, there was a craze recently for applying moisturiser and then gloves to the hands before going to bed- these gloves you can buy in chemists/pharmacies and are the exact same as chocolate gloves-a cotton and Lycra mix.
 |
| remove the egg, but wear gloves to avoid fingerprints |
To stick the egg halves together warm a tray in the oven (not too hot-your hand should be able to hold the tray-about 40C)
 |
| warm one side on a warm tray |
Now place the warmed half on top of the other side and make sure the edges are in line so the join is neat.
 |
| a plain egg |
The I added sugar crystals to the letters on the egg below and using edible white paint added some more decoration
The letters on this egg had dried petals added to the letters to add further interest to the eggs


No comments:
Post a Comment